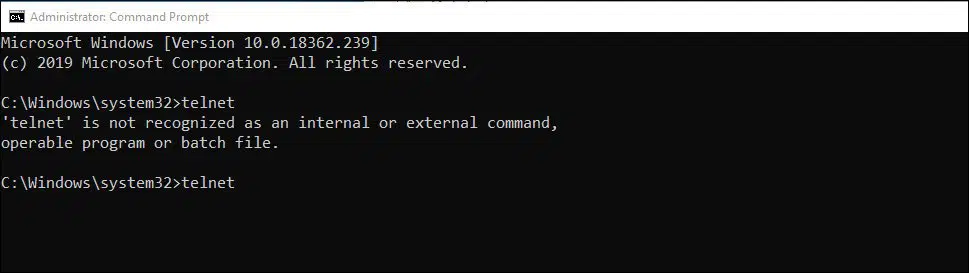
In this post I will show you how to enable Telnet in Windows 10. By default when you install Windows 10, the telnet isn’t enabled on it. When you attempt to launch Telnet via command prompt on newly installed Windows 10, you see the below message.
‘telnet’ is not recognized as an internal or external command, operable program or batch file.
So what is Telnet ? – Telnet is an underlying TCP/IP protocol for accessing remote computers. Using Telnet, an administrator or another user can access someone else’s computer remotely. Telnet lacks authentication policies and data encryption so this is one of the reason why people don’t use telnet. SSH is a good option over Telnet. SSH provides strong authentication and secure encrypted data communications between computers over an insecure network.
Telnet consists of two services – A Telnet Client and Telnet Server. A Telnet Client allows a computer to connect to a remote Telnet server and run applications on that server.
Telnet is included with several operating systems like Windows 7, Windows 10. However like it said before it is better to use SSH instead of telnet.
Normally there are two ways to install Telnet on Windows 10.
- Using Control Panel
- Using DISM
I will cover both methods in this post. To read more about Telnet click here.
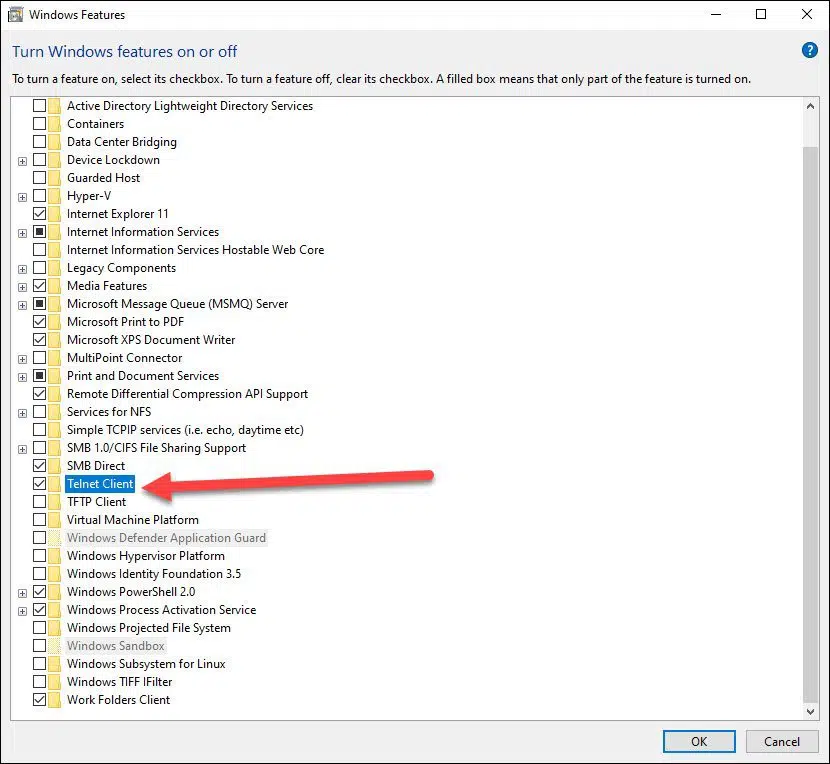
How to Enable Telnet in Windows 10 via Control Panel
To enable or install Telnet in Windows 10 via control panel –
- Login to your Windows 10 computer.
- Open Control Panel > Programs > Programs and Features.
- Click Turn Windows features on or off.
- From the list, enable Telnet Client option.
- Click OK.
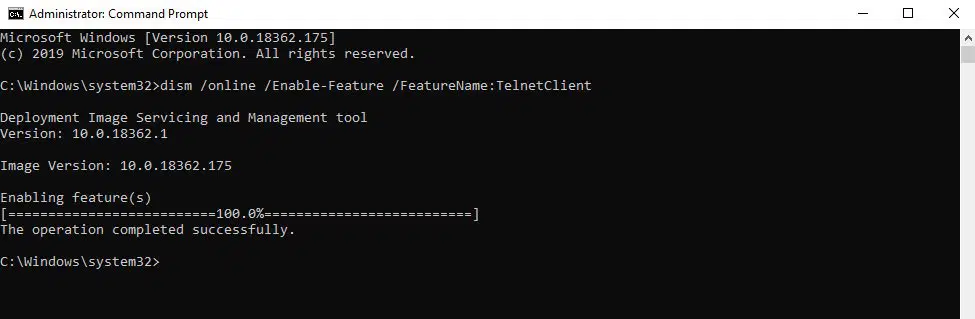
Enable Telnet using DISM Command
To enable Telnet in Windows 10 using DISM command –
- Click Start and under search type in CMD
- Right click on CMD and click on Run as administrator
- Enter the Administrator password if it prompt
- Then type in dism /online /Enable-Feature /FeatureName:TelnetClientand hit Enter to enable the Telnet Client.