How to Uninstall OneDrive on Windows 11
If you aren’t using OneDrive on your Windows 11 PC, I will show you how to uninstall OneDrive on Windows 11. You may also disable OneDrive if you don’t want to uninstall it.
The Microsoft OneDrive comes preinstalled with Windows 11. OneDrive is a great tool for keeping your files stored in the cloud, but some users have their own preferred cloud storage app or want to keep everything on local storage.
The OneDrive on Windows 11 updates itself regularly as and when the new updates are released by Microsoft. Even though you aren’t using OneDrive, the software launches as soon as your computer boots, which is another problem. It keeps running in the background, using up system and network resources as it does so.
OneDrive starts up as soon as your computer turns on. It operates in the background and tries to sync your documents to the cloud. Systems with the bare minimum of compute resources may have performance issues. As a result, if your PC isn’t equipped with best hardware, disabling the OneDrive or removing it entirely can help free up some valuable processing power for other tasks.
There are multiple ways to remove OneDrive from your PC. You can use methods such as PowerShell, GPO, command prompt etc. The easiest way to remove OneDrive is via Control Panel which most users are familiar with.
How to Uninstall OneDrive on Windows 11
You can quickly uninstall OneDrive on Windows 11 PC with following steps:
- Select the Start button, type “Control Panel” in the search box and select it from list of results.
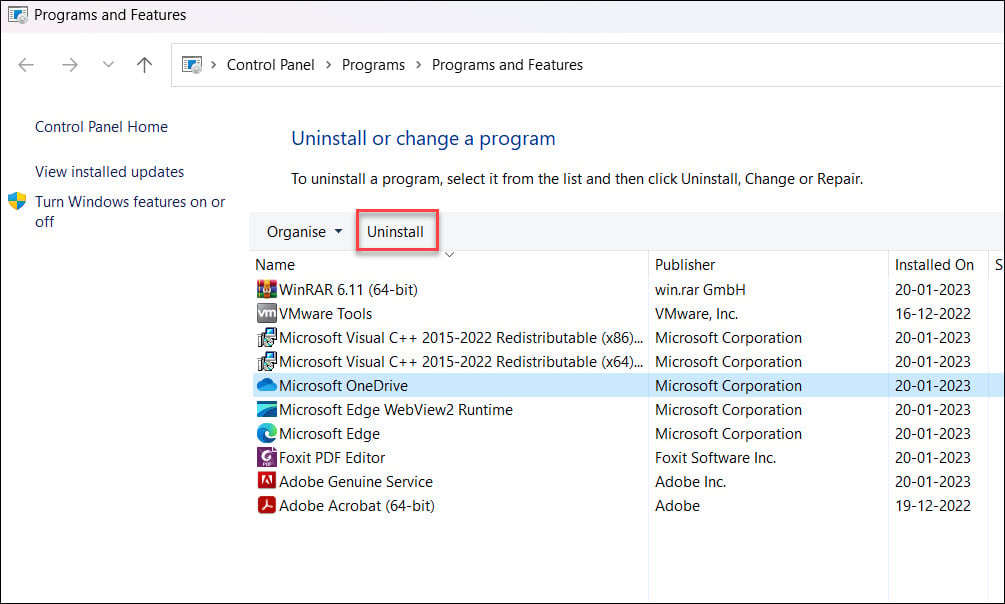
- In the Control Panel window, select Programs > Programs and Features.
- Under Programs and Features, find and select Microsoft OneDrive, and then select Uninstall. If you’re prompted for an administrator password or confirmation, type the password or provide confirmation.
It takes only few seconds to completely uninstall OneDrive from Windows 11. In case you require OneDrive at a later point of time, you can download it Microsoft and install it on your Windows 11 PC.

An alternate method to remove OneDrive app on Windows 11 involves uninstall it from Installed Apps. Press the Windows key, choose Settings from the Start menu or use the Windows key + I keyboard shortcut. On the Settings App window, click Apps from the left column and the Installed apps option on the right.

Type OneDrive in the Search field at the top, click the three-dot button to the right of OneDrive, click Uninstall, and click Uninstall again to verify.

If you are looking to uninstall OneDrive on Windows 11 using command prompt, you can use the below commands to do that.
- If you are on a 32-bit system, type: %systemroot%\System32\OneDriveSetup.exe /uninstall
- If you run a 64-bit version, type: %systemroot%\SysWOW64\OneDriveSetup.exe /uninstall


