How to Add Custom Tab in Software Center ?️
Starting with SCCM 1806, Microsoft added the ability to add a custom tab in Software Center. Let me show you how easy it is to add a new custom tab in Software center.
While the SCCM Software Center customization is interesting, there are lot of cool things that you can actually do. For example, you can select a logo for Software Center, set a color theme for Software center, set the company name etc.
You can also create shortcuts for SCCM Software Center, if you need to know how that’s done, check this post.
How to Add Custom Tab in Software Center
To add a new custom tab in SCCM Software Center
- Launch the SCCM console.
- Navigate to Administration > Overview > Client Settings.
- Right click Default Client Settings and click Properties.
- Select Software Center and click Customize.
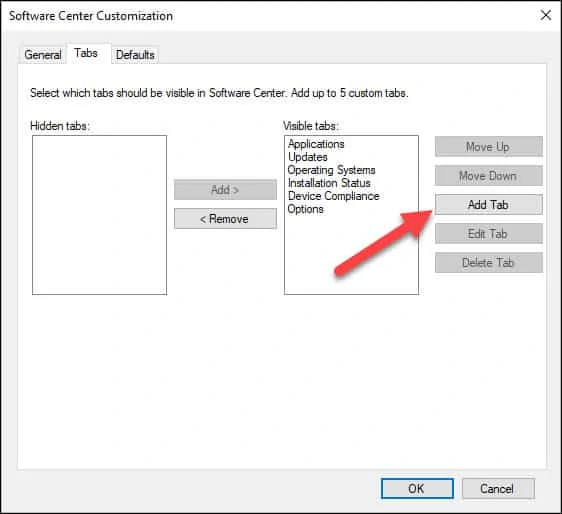
- Click Tabs and then click Add Tab. Specify the Tab Name and Content URL.
Most of all remember that under Device Settings, you must set Yes for new settings to apply. Otherwise you will still see the old Software Center.
Click Customize to add a new custom tab.
By default you will see the following tabs in Software Center.
- Applications
- Updates
- Operating Systems
- Installation Status
- Device Compliance
- Options
To add a new tab, click Add Tab button.
In the New Custom Tab window, specify the tab name. The same name appears in the SCCM Software Center. Provide the Content URL which is a link to Community Forums in my case. However in your case you could specify a link to your ticketing tool, confluence page etc.
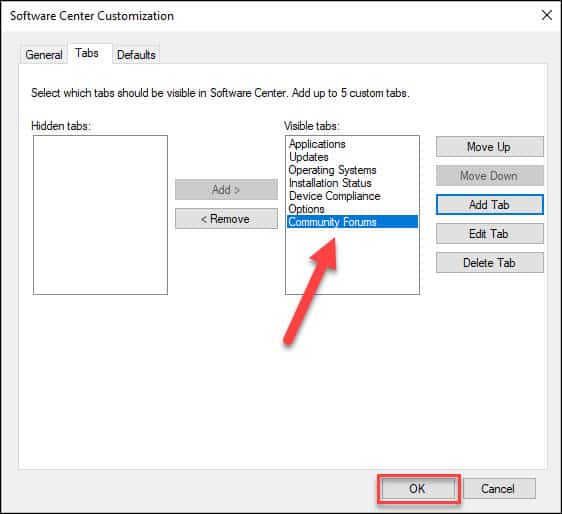
Click OK when you enter the details.
You can change the order of the custom tab in SCCM Software Center. To do so, select the Custom Tab and click Move Up. When done, click OK.
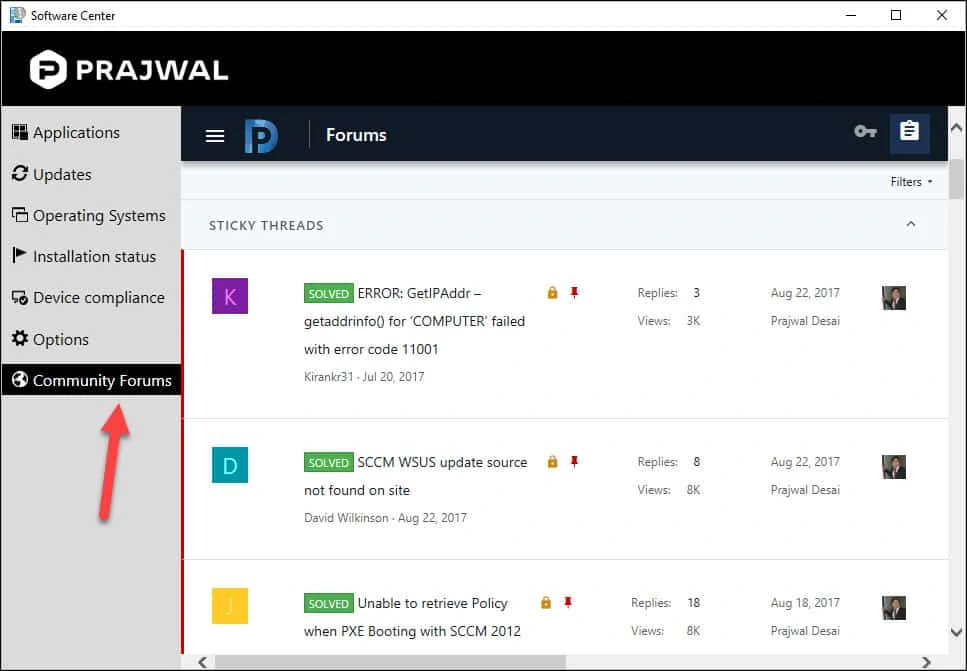
Finally let’s see the result. On the client computer, launch Software Center. The custom tab that we just added can be seen. Clicking the tab opens the link in the right pane. This is awesome.


